How to Properly Place Violin Bridges
In this article about the best violin bridges we will discuss everything you need to know about the perfect bridge for violin for you. The violin bridges are small wooden devices that support the strings on an instrument. It is quite common for them to fall off while tuning. This means that you will have to buy a violin bridge replacement now and then. Placing it may seem like quite the complicated process. However, it is fairly simple. If you have some patience, you will easily be able to install the bridge violin. Continue reading our article about the best violin bridges to find out more about the proper violin bridge placement.
Method 1 – Position the Bridge Correctly
The the first method is about carefully positioning bridge of the violin:
You should first identify the G-string and E-string sides
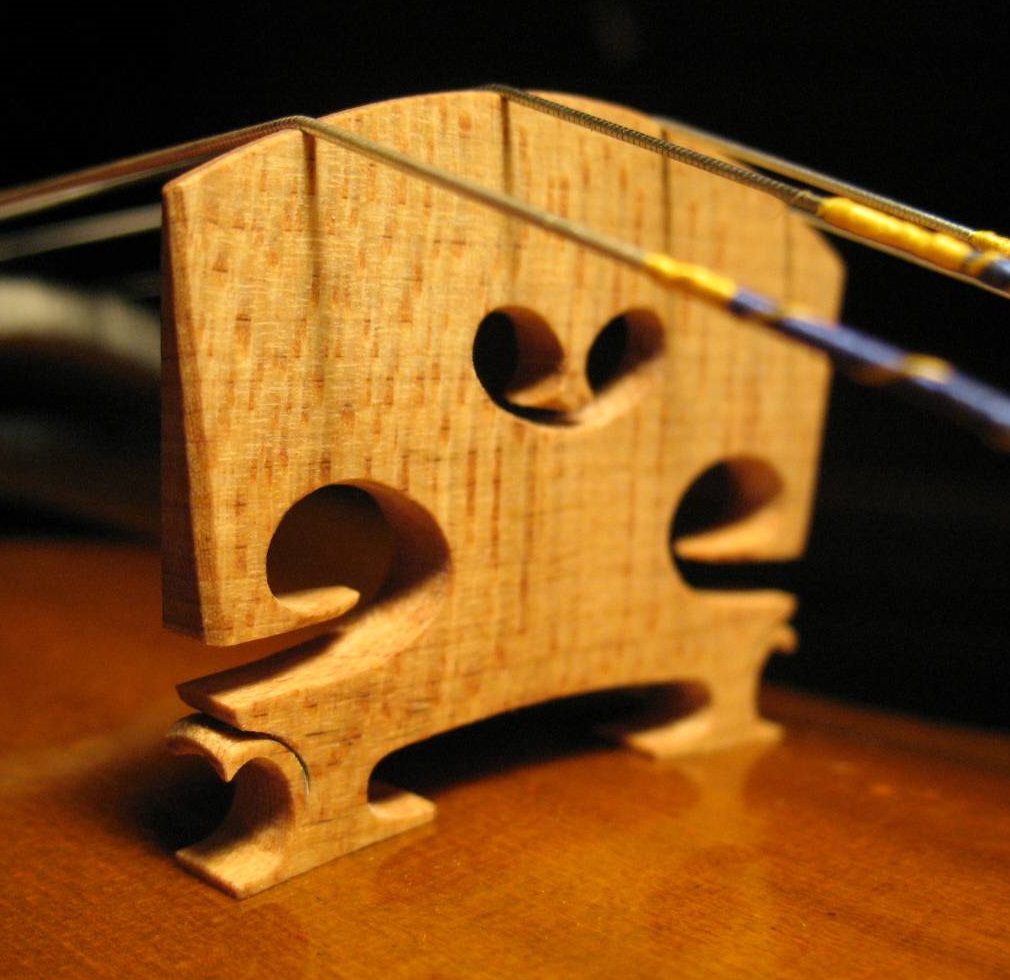
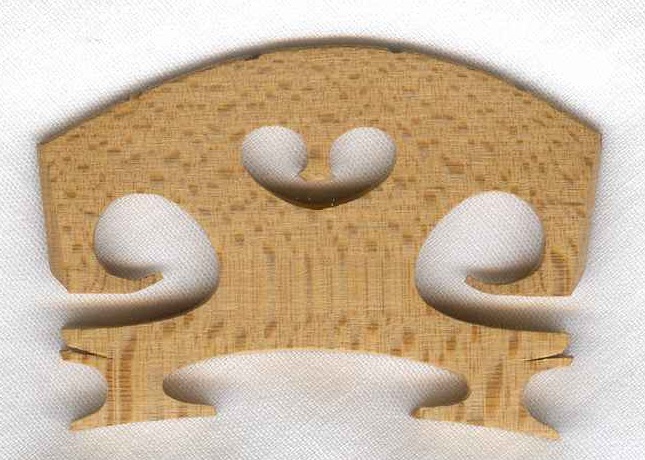 As we stated earlier, the best violin bridges are small pieces made from wood. The bottom of that section is typically a straight line, while the top is slightly arched. While you are examining your bridge, you may notice that one side of the head is slightly higher than the other. This is the g-string side; the lower one is the E-string one. When you put one of the best violin bridges in their place, you have to make sure that the g and e strings come from their designated sides.
If you do not recognize which string is which, put the violin head to face your body. The E-string is the farthest to the right, while the g is farthest to the left.
Afterwards, you have to slightly loosen up the strings
To avoid the snapping of a string, while trying to place the bridge, you will have to slightly loosen the strings. You can do so by turning the small knobs on the end of the instrument. The strings should be loose enough so that you can pull them up or down easily. This will allow them to be lifted sufficiently enough to place the bridge under the strings.
Next, you should carefully consider the violin bridge placement between the F holes
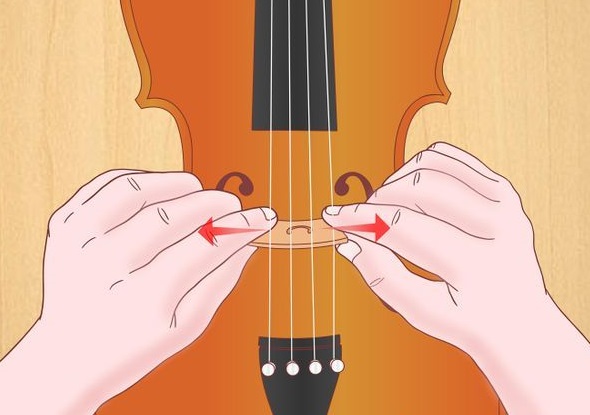 The f-holes are two small gaps. You can find them near the end of the violin’s head. When you manage to slide the bridge underneath the strings, you have to make sure that it is between the two F holes. The bridge has to be placed approximately in the middle between the gaps. What I usually do is imagine that I am drawing a line between the f-holes. I start from the small horizontal line going through one of the gaps and stretching out to meet the other horizontal line, which goes through the other f-hole. So the imaginary line has to go through the violin bridge.
Now, put the strings in the appropriate knobs on the violin bridge
As we stated earlier, the violin bridge has four buttons which run across the top. The four strings fit into the buttons, and they keep the strings and the bridge in place. You should gently, feed one string at a time, in the knobs on the violin bridge.
Finally, you should tighten up the strings
Now you should retighten the strings to keep each of the knobs in their place. You can do this by gently turning the knobs on the bottom side of the violin. It is usually a good idea to use one of your hands to hold the bridge in one place while you tighten the strings. This will prevent it from falling over. You should keep tightening the strings until they are secure enough to maintain the wood piece in its place, while still being slightly loose. Keep reading about bridges in our site for top rated violins.
Method 2 for Positioning the Bridge
Here is another method that will help you with positioning the bridge of the violin:
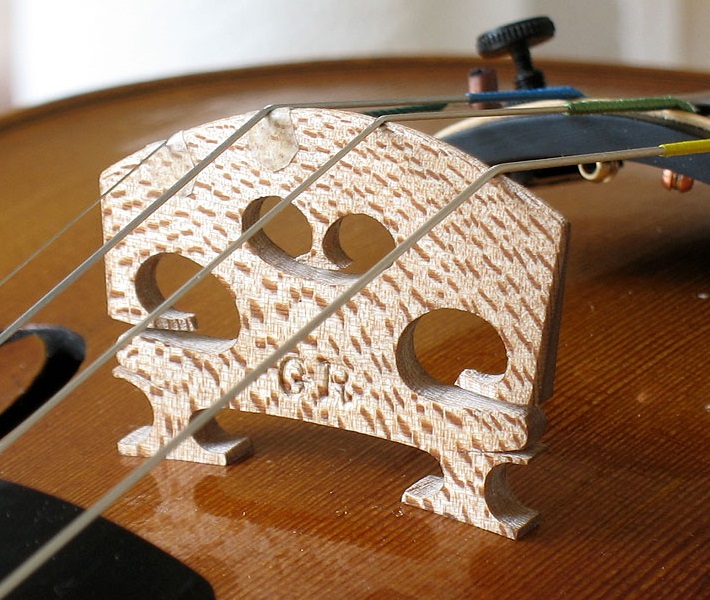
You should make the bridge stand at a 90-degree angle
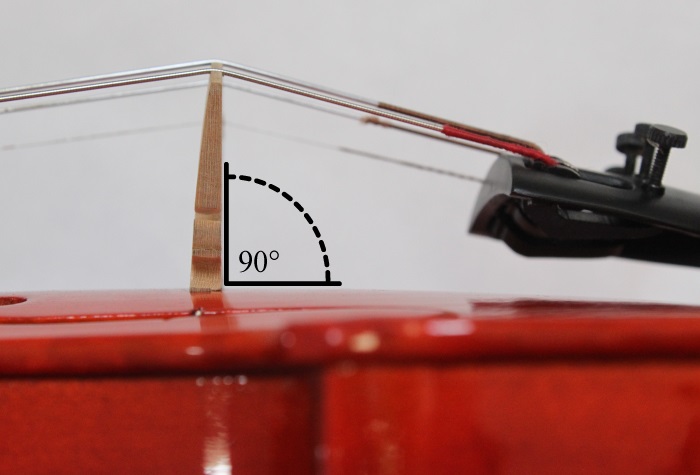 Once you manage to set your bridge, you will want to check and make sure that you have correctly set it. Start with laying your violin on a flat surface. Next, get down to the instrument’s level. The side of the bridge that faces the tail has to stand at approximately 90 degrees. The other side should be slightly sloped forward. If the bridge does not form an angle of roughly 90 degrees, you may have to place it backwards. This means that you have to remove it and try again from the beginning./
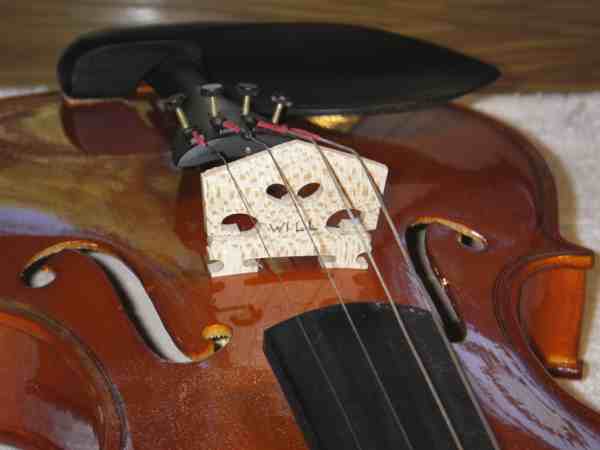
Next, you have to check and make sure that the bridge is in the middle of the instrument
The bridge has to be in the center of the violin. It must not be too far to the right or the left. If it is leaning to either direction, you should gently push it until it is in the center of the instrument. You can simply make sure that the bridge is in the center by looking at the violin from a bird’s eye view. If you want to be sure that your bridge is correctly positioned, you can use a measuring tape or a ruler and measure the length of each end of the bridge to the end of the violin. The measurements have to be approximately equal.
Lastly, you should make sure that the bridge is approximately in the middle of the F-holes
The bridge must be roughly in the midst of the f-holes. It is possible that the bridge slipped slightly while you were tightening the strings, so you will have to check once again. Make sure to draw an imaginary line between through the center of each of the holes and runs through the bridge. If the bridge has changed its position, you should gently slide it up and down until it falls in the right place. Keep reading our article about the best violin bridges.
Tips on Setting the Bridge
 After positioning the bridge correctly, you have to make sure to adjust the settings.
Start with holding the bridge while you are tuning your violin: It is common for the bridges to fall out of place while you are tuning them. If you want to prevent this from happening, you can make sure that the bridge stays in its place by holding it while tuning.
Continue with replacing the strings one by one: Occasionally, you will have to replace the strings on your instrument as they tend to wear down and even break from time to time. If this happens, it is best if you replace them one by one. If you remove more than a single string at a time, will most likely result in the bridge falling out of its place.
Remember that sometimes it is better to have a professional replace it for you: If you are new at this, it is quite possible that you damage one of the strings or the bridge, while trying to replace the bridge. If you do not feel confident in placing it, you should ask your tutor or the music shop you bought it from to do it for you. If you take it to a professional, he will make sure that it is the appropriate size, sand it and he will adjust the sound post. Continue reading about the best violin bridges in our article.
How to Avoid the Best Violin Bridges from Snapping
Before you start tuning your violin, the most important thing you have to check is the position and the orientation of your instrument’s bridge. If you do not correct it, the bridge might snap on the violin’s top surface, which will cause damage to the varnish. Usually, it snaps forward, because when you tighten the strings often moves the upper part of the bridge forward.
Sometimes, when the bridge snaps, it may cause the sound post in the body of your instrument to fall. This is quite unfortunate and happens because of all the tension from the strings pressing the belly suddenly disappears. So when the bridge snaps, it gives the top a knock, which has a force strong enough to shake the soundpost off.
 The only way you can correct this is by bringing the violin to your local violin maker or music shop to have it reinstalled. You should not try to reinstall the soundpost on your own, as you can potentially damage your instrument. The people who can do this by themselves possess special skills, which include where and how to properly place the soundpost. If it is installed correctly, it will not fall off, even if you remove the strings.
Another reason to correct the orientation and position of the bridge is that it will optimize the sound of your instrument. Keep reading our article about the best violin bridges.
Tips on How to Work with the Best Violin Bridges
Crafting a good bridge starts with the careful observation of the model. This includes the f-holes, arching, bass-bar, neck, fingerboard, and top wood. The violin’s characteristics and sound, as well as the needs of the musician all, play an important part in making the decision about the bridge as do the strings and bow.
Buy the perfect wood
 The secret in the first place is to buy the perfect wood. It must be straight, close grain; the maple has to be from a tree that was between 5 and 15 metres high and approximately 200 years old. Not only the closeness to the annual rings is crucial to the sound, which is ideally running straight across the bridge. What else is quite important are the flecks or in other words the medullary rays, which are running down the bridge. The sound vibrations travel through them, to the resonating table beneath.
The bridge contains four qualities. The first one is the superior extra choice; these are made from the finest wood, which has seasoned for approximately eight years, and only the best pieces were selected from it. The second is a superior first choice, these are well-figured pieces of wood, which seasoned for approximately three years. Moreover, the last two are the selected study choice, which is just figured wood and the study choice, which is just lightly figured wood.
As light as possible
A major aim should be to make the bridges as light as it is possible for them to be, without distorting or collapsing. However, there are a couple of schools of thought that can achieve this. One of them states that you can excavate as much as you can from under the bridge, which will make the lower arch round and high and the ankles would be a bit tall and would concentrate on the mass in the higher breast of the bridge. From this, you will be rewarded with cutting and brilliant tone, which can compensate for an unresponsive and even dull instrument. The another way is if you can cut the bottom sweep as low as possible, the ankles thin and short and the center of gravity close to the table. It does often lack the brilliance of the high-cut bridge. However, it will make up for that in depth and richness.
Making adjustments to the bridge
- You can easily achieve the correct angle of the bridge by having the tailpiece side of it standing roughly perpendicular to the table of the instrument. The feet of a properly cut bridge should be fitted to match the contour of the location of the belly. As the bridge starts to lean, the downward pressure from the strings will enforce the feet to stay in the middle of the bridge and might eventually cause the bridge to break or warp. This will require bridge replacement, which may be costly. So when you tune or pitch your violin, you will have to frequently examine and adjust the bridge for its proper angle.
 To produce a proper vibration, the foot center of the bridge has to be over the bass bar. In many cases, the end of the foot is over the bar, so the ends are frequently thinned down for fitting, making them non-rigid and elastic, so that there is no actual vibration given from the bar to the strings. The bar’s position can be easily ascertained if you insert a piece of a card under the sound hole, which is opposite to bridge and mark the distance to the edge of the hole.
- If the f-holes are cut in the correct place, the distance between their upper circles should be the guide for the outside width of the bridge between feet. The exact width of the feet should correspond with the width of the bass bar, as well as, the other in a direct line over the sound post. This will provide the bridge to be properly placed.
- When you decide to change your strings, you should take a sharp pencil and smudge a little graphite into the groove of the string for lubrication at the bridge and the nut. After you change each of the strings, you should check the bridge for straightness, by looking at it at the bass side, as the soundpost side is more likely to have become distorted. If the back of your bridge is almost at a right angle, with the top of the violin on the tailpiece side, and the top of the bridge fading towards the fingerboard slightly, you have placed it properly.
- Some of the early bridge designs have just a few openings, which will leave too much mass at the top of the bridge and will immediately turn the strings. This will restrict the sound, especially of the middle ones. The best bridges have openings under each one of the strings, which helps them to achieve a more even sound over the compass of the violin.
We hope that our article about the best violin bridges answered all your questions about the violin bridge position and violin bridge replacement.
Read About Violin Bridges Online
- Violinist Hilary Hahn Knocks Bridge Over During a Concert (Helped by Two Luthiers in the Audience)
- Violin Bridge Market – Growth, Opportunities and Forecast (Global Trends, Market Share, Industry Size)